BLOG
Need asbestos testing in Spokane WA? Learn what vermiculite insulation is, when to schedule an asbestos inspection and how an asbestos testing lab Spokane WA
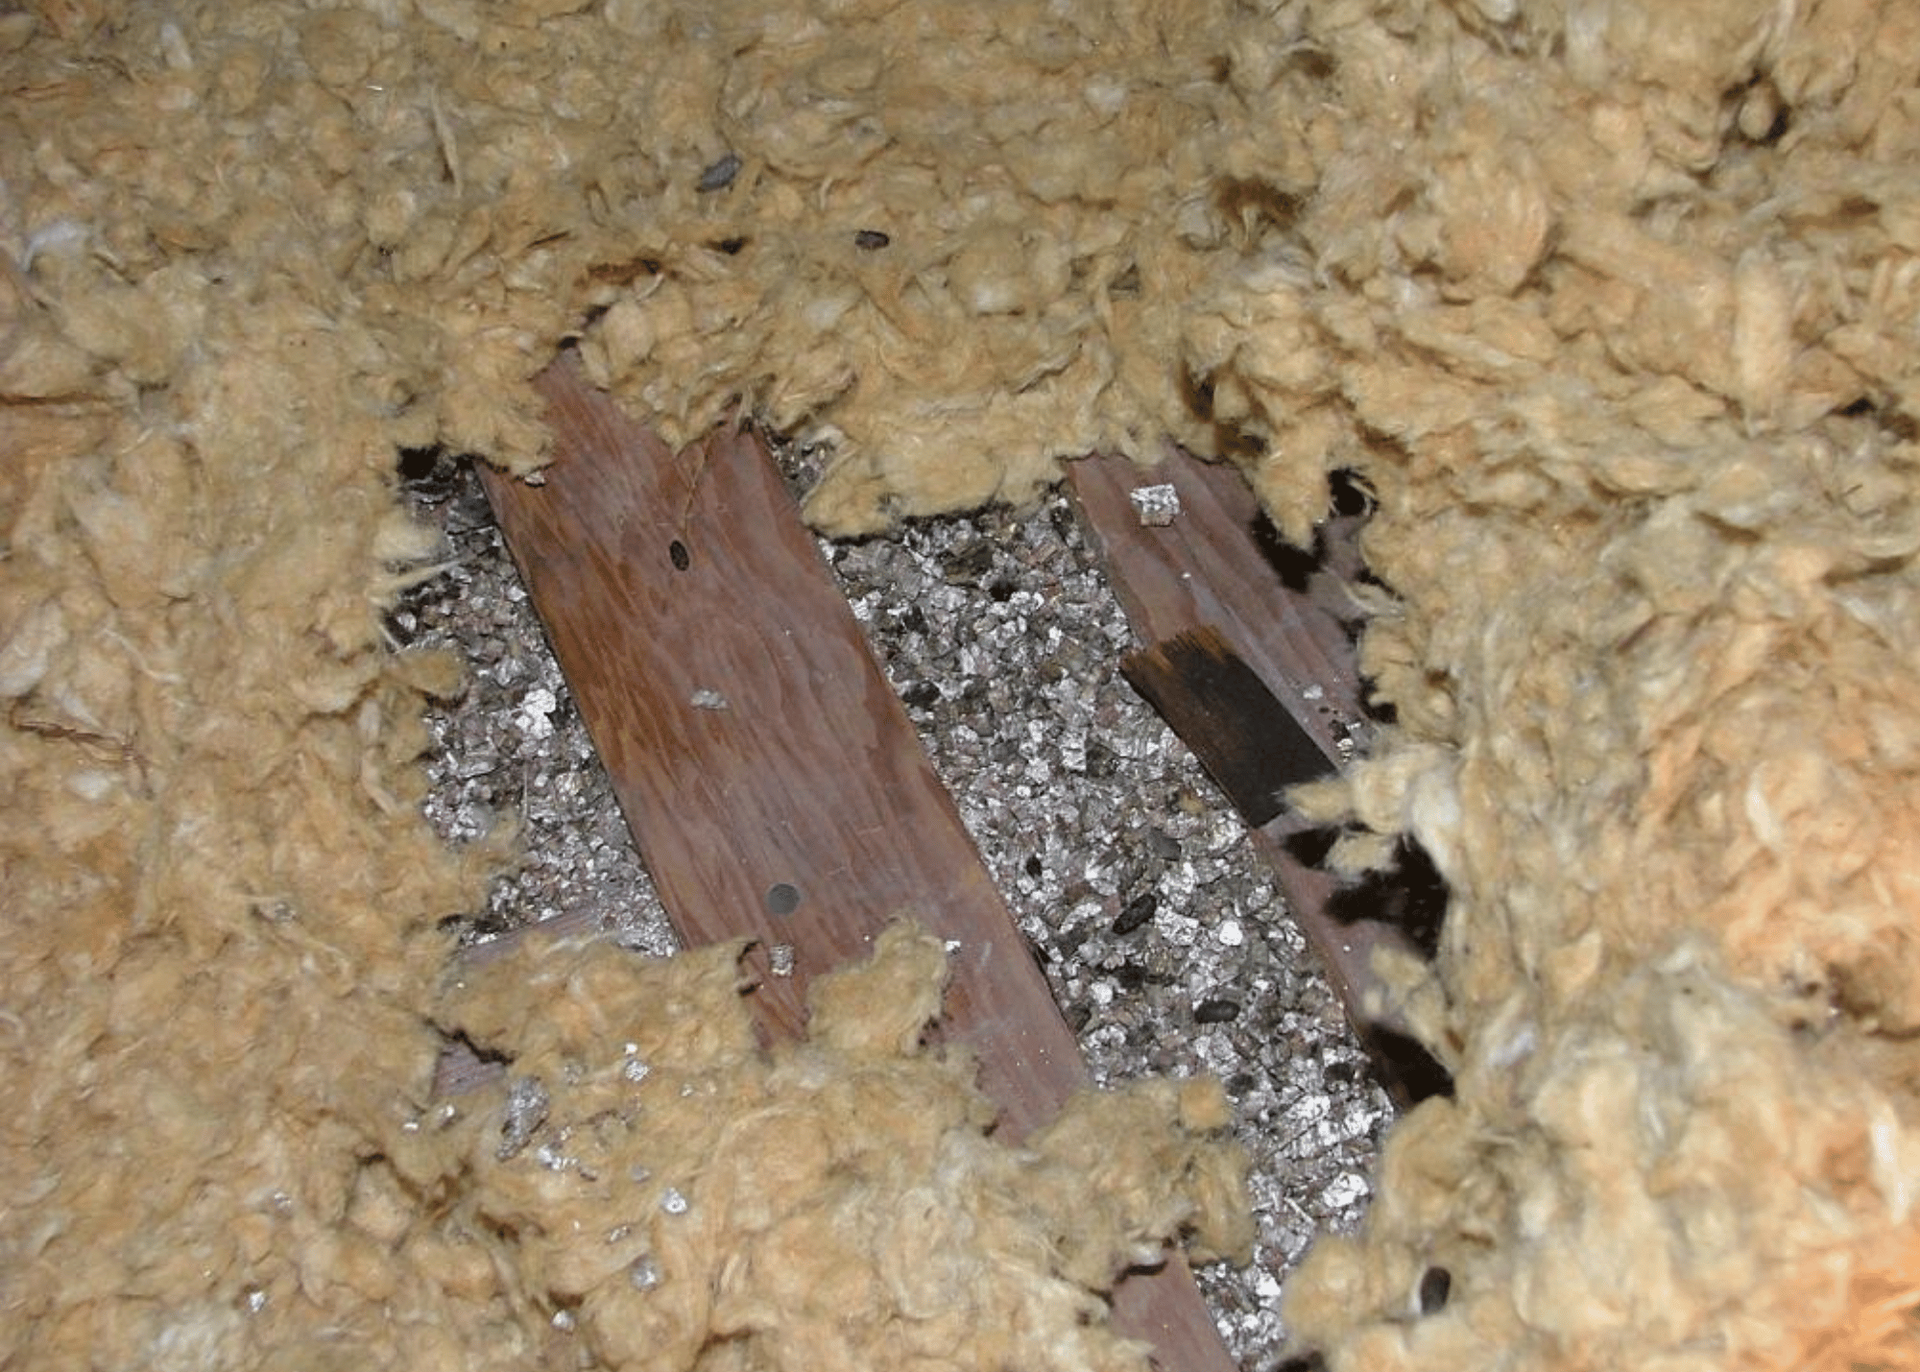
Signs Your Spokane Attic May Contain Vermiculite

Ensure a successful real estate inspection. Use a house inspection checklist and gain confidence in your real estate decisions.
Ensure safety with essential asbestos testing in Spokane, WA. Discover reliable testing services to protect your property and health today.
Professional asbestos removal in Spokane County. Safe attic asbestos removal, AHERA inspections, containment procedures, and compliant disposal.
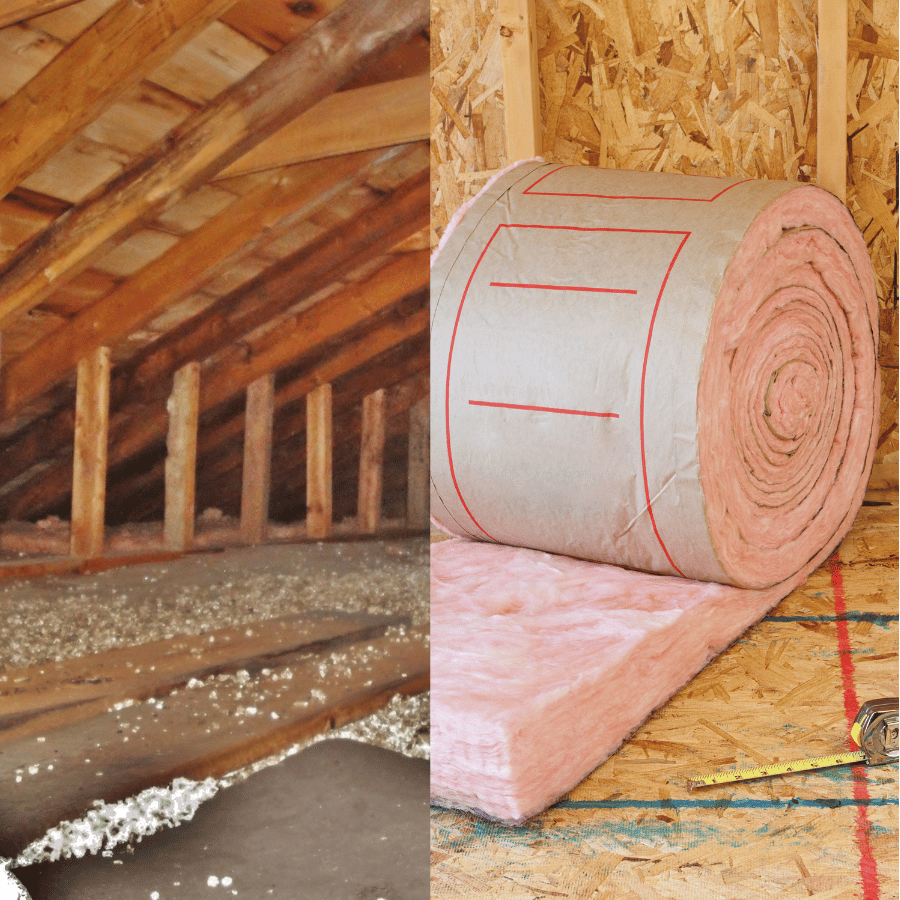
Learn the step-by-step vermiculite removal process in Spokane County, including AHERA inspections, SRCAA filing, containment, disposal, and re-insulation.

Can you sell a Spokane home with vermiculite insulation? Learn disclosure rules, lender concerns, buyer reactions, and whether removal is necessary.

Discover where homes containing vermiculite insulation are commonly found in Spokane, which neighborhoods are most affected, and what homeowners should know.
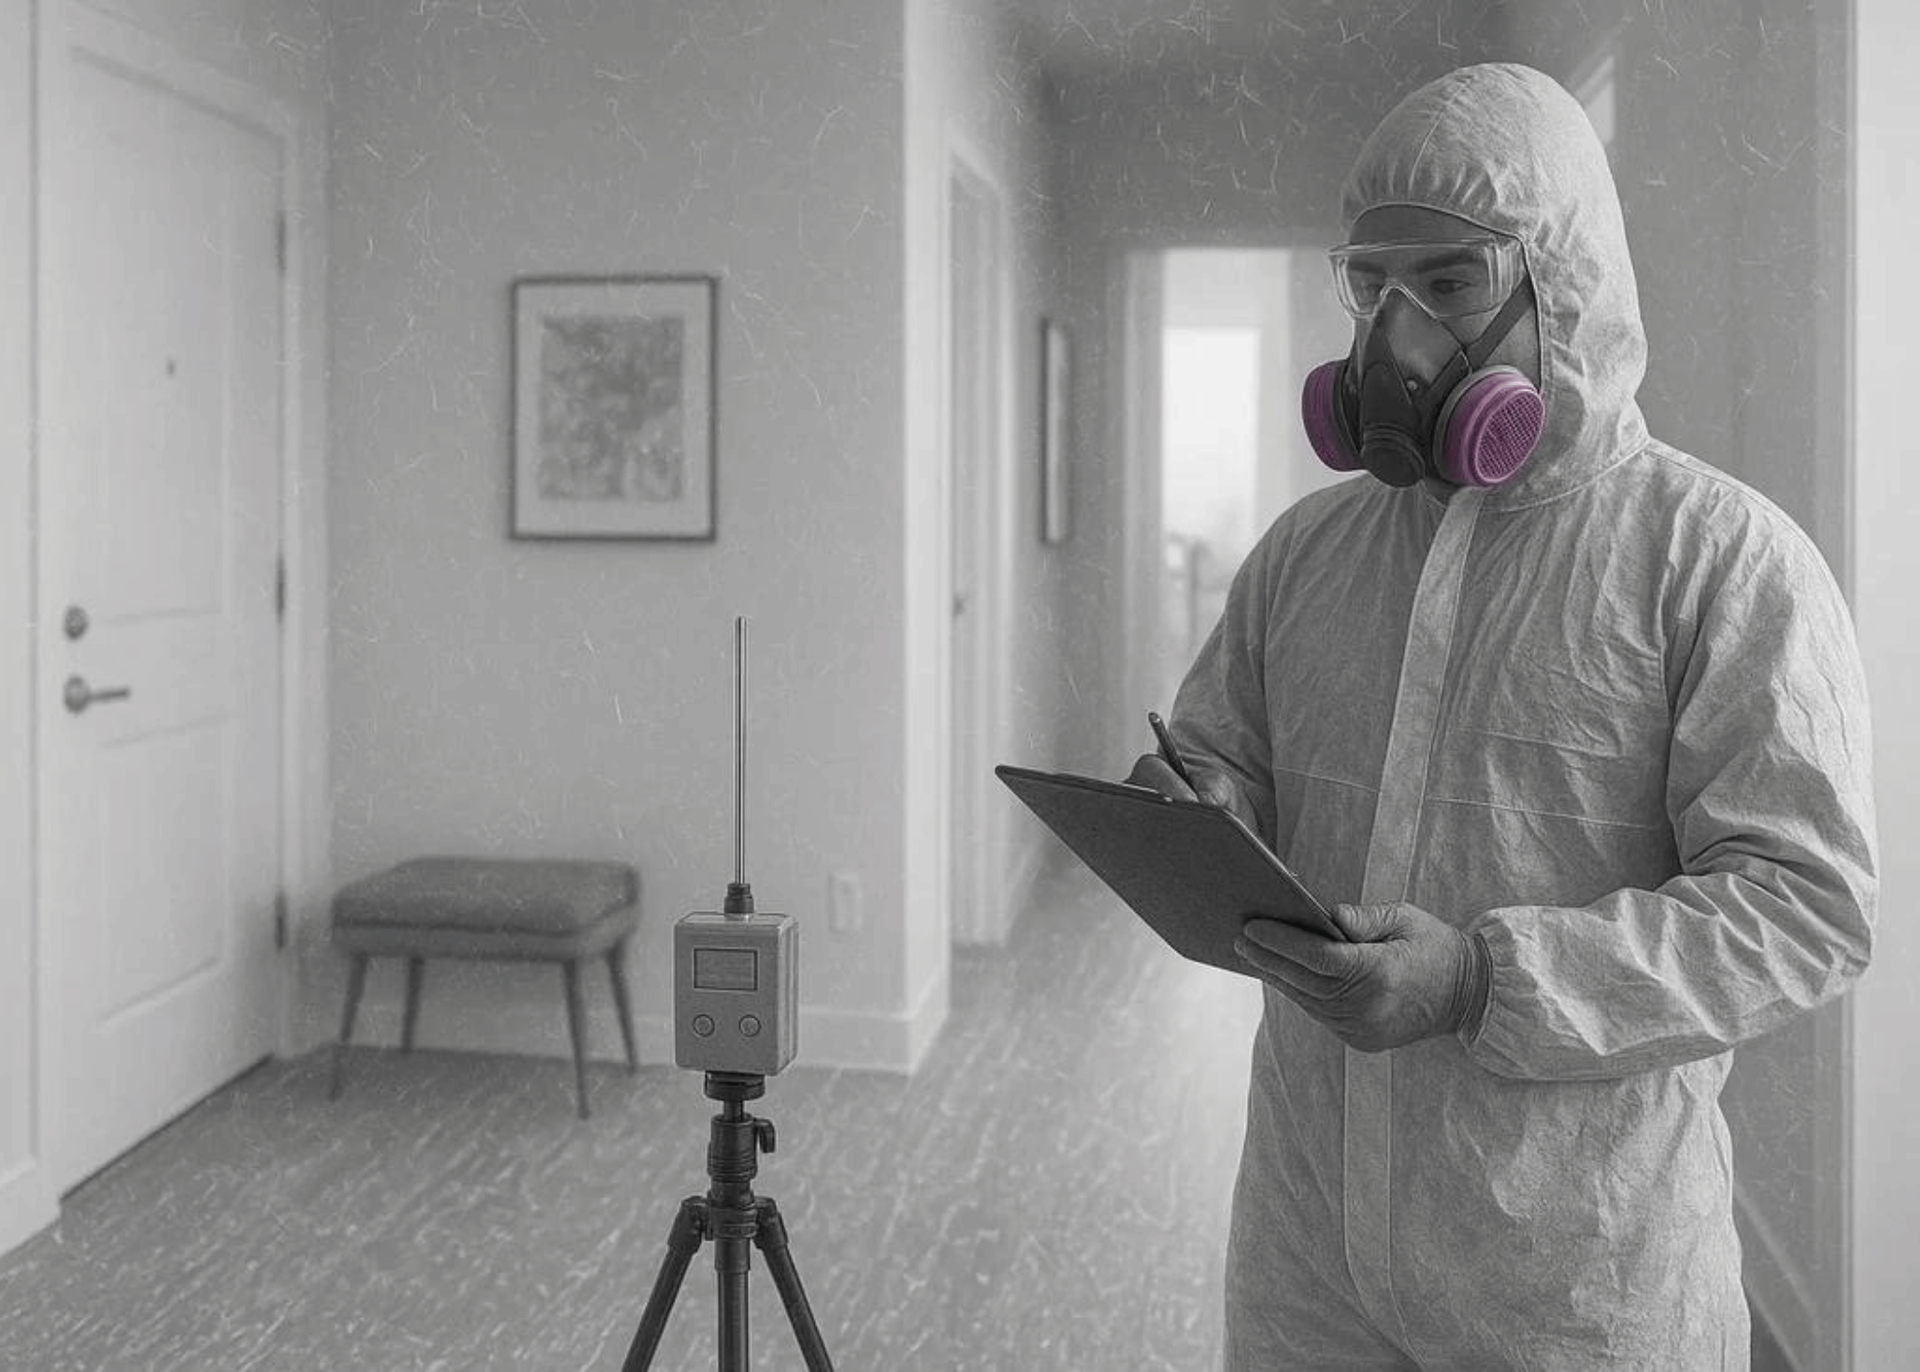
Learn when to schedule an asbestos inspection in Spokane, including renovation triggers, vermiculite concerns, SRCAA rules, and AHERA requirements.
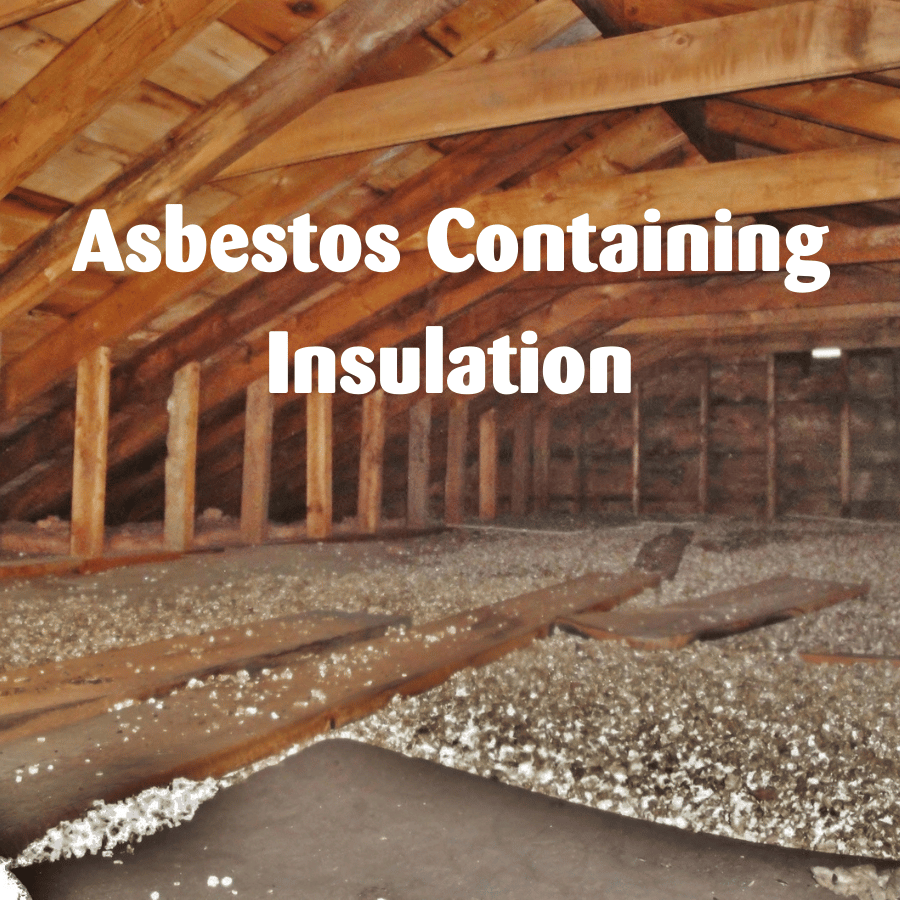
Learn whether vermiculite insulation in Spokane homes contains asbestos, the health risks, inspection steps, and what to do if it’s in your attic.